How To Install Electric Dog Fence
Keeping your furry friends safe and secure in your yard is a top priority for many pet owners, but installing and maintaining a physical fence can be a costly and time-consuming endeavor. Luckily, there is an invisible way to keep your pets within the boundaries of your yard. Over the last few decades, electric dog fences have become a popular alternative to keeping your dogs within your yard without constructing a traditional fence.
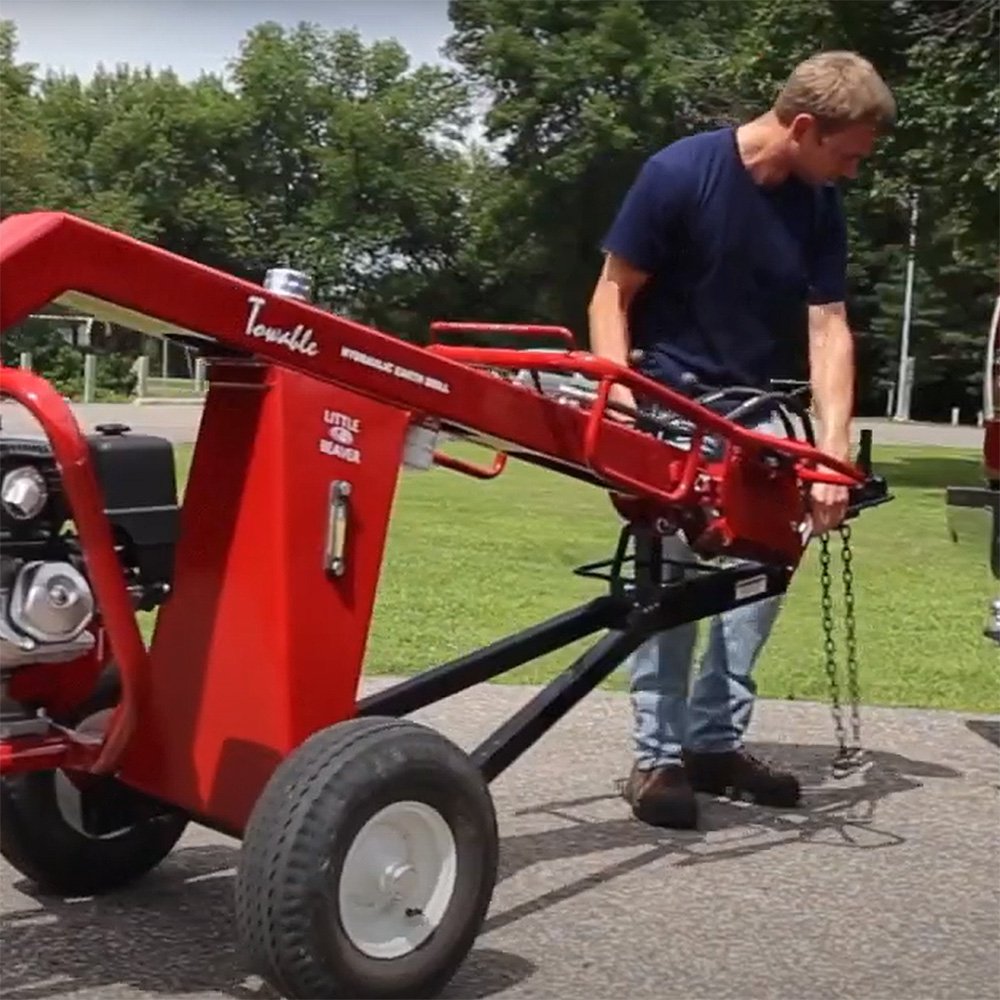
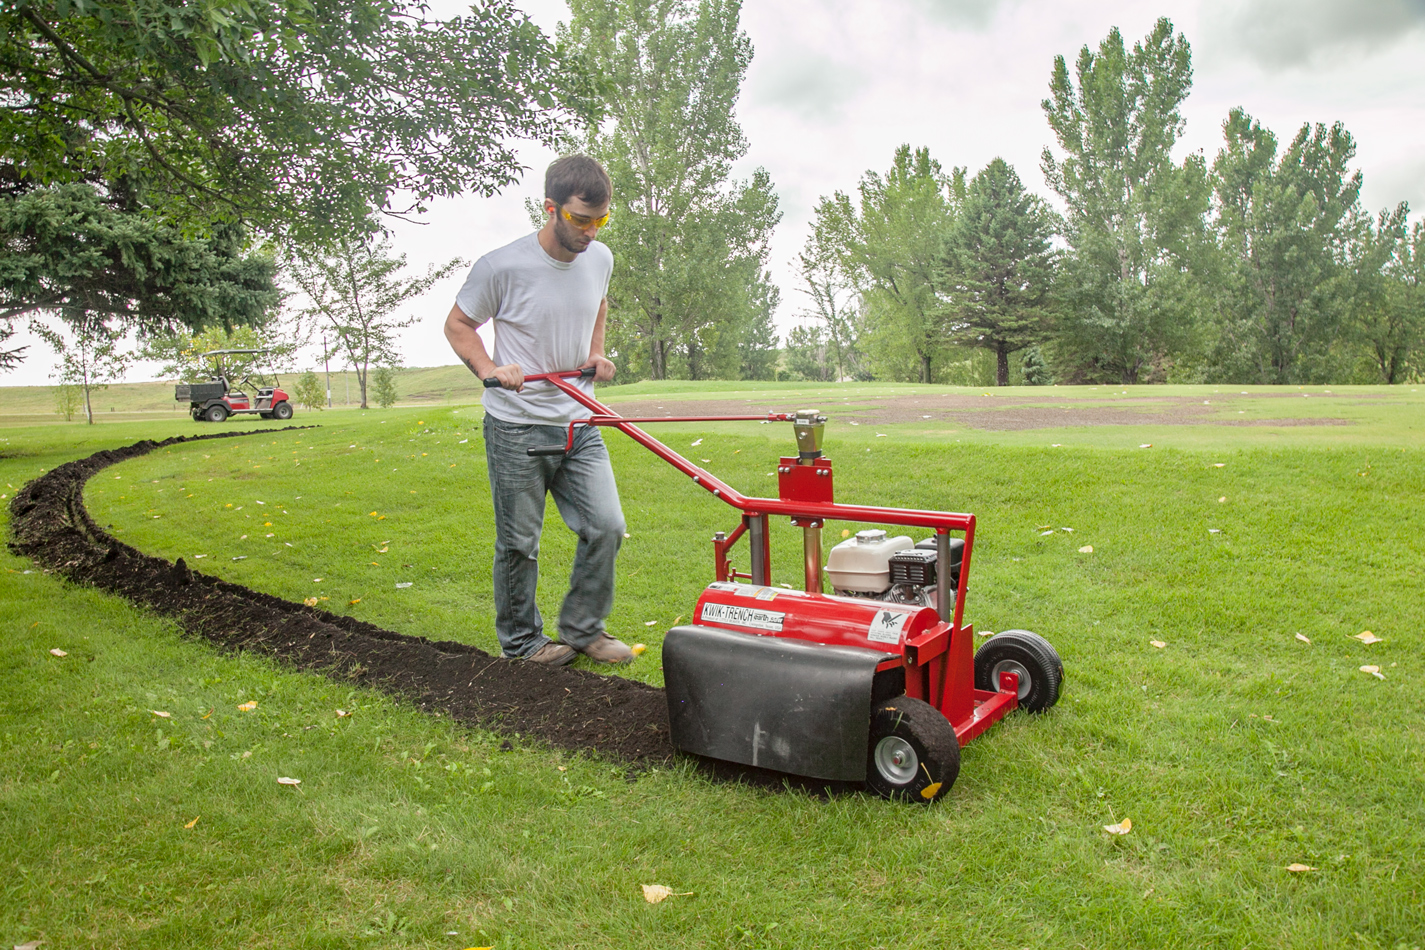
There are many ways to install an electric fence, but most require you to take on the physical chore of manually digging a long trench for the wiring. Avoid aches and pains by using an earth saw like the Kwik-Trench to do all the hard work for you. Below, we have laid out a few key steps you should take when starting your electric dog fence installation.
Mark The Perimeter
Before the digging can begin, you should mark the boundaries of where you would like the fence to be placed. This will avoid making the area too big or small. It will also allow you to easily follow the marked path while digging to make the job even easier. During this time, also reference your specific dog fence manual to see if there are any restrictions on where the fence can be placed. A common mistake people make during this process is having a designated spot for the transmitter box to be plugged in. We recommend that you place the transmitter box in your garage or shed. However, any covered outdoor outlet will do.
During this beginning process, it is important to take the time to call 811. This is a national digger hotline that helps you map out where all the important utility pipes, wires, and lines are located on your property. Even though the trench needed for an electric dog fence is not deep, this is still a critical step to ensure safety.
Create Crossing Points
Crossing points are the spots where your dog can cross freely without being shocked. You will want this at your backdoor or other entry point to your home so your dog can easily go back inside. Though you could also create more crossing points throughout your fence for other areas, you would like your dog to have access to.
To create a crossing point in your electric fence, you will need a pair of wire cutters, pliers, twisted wire, and a splicing kit. When you reach the space where you would like to create the break, cut the wire, and remove the pin of the wire to disconnect it from the transmitter box. Then you will have to take the twisted wire and twist it to the end of the fence wire. You should have at least one inch of twisted wire to cap off the end. After all the crossing points have been made, you will need to splice the twisted wire, and then the fence is ready to be installed.
Time To Dig
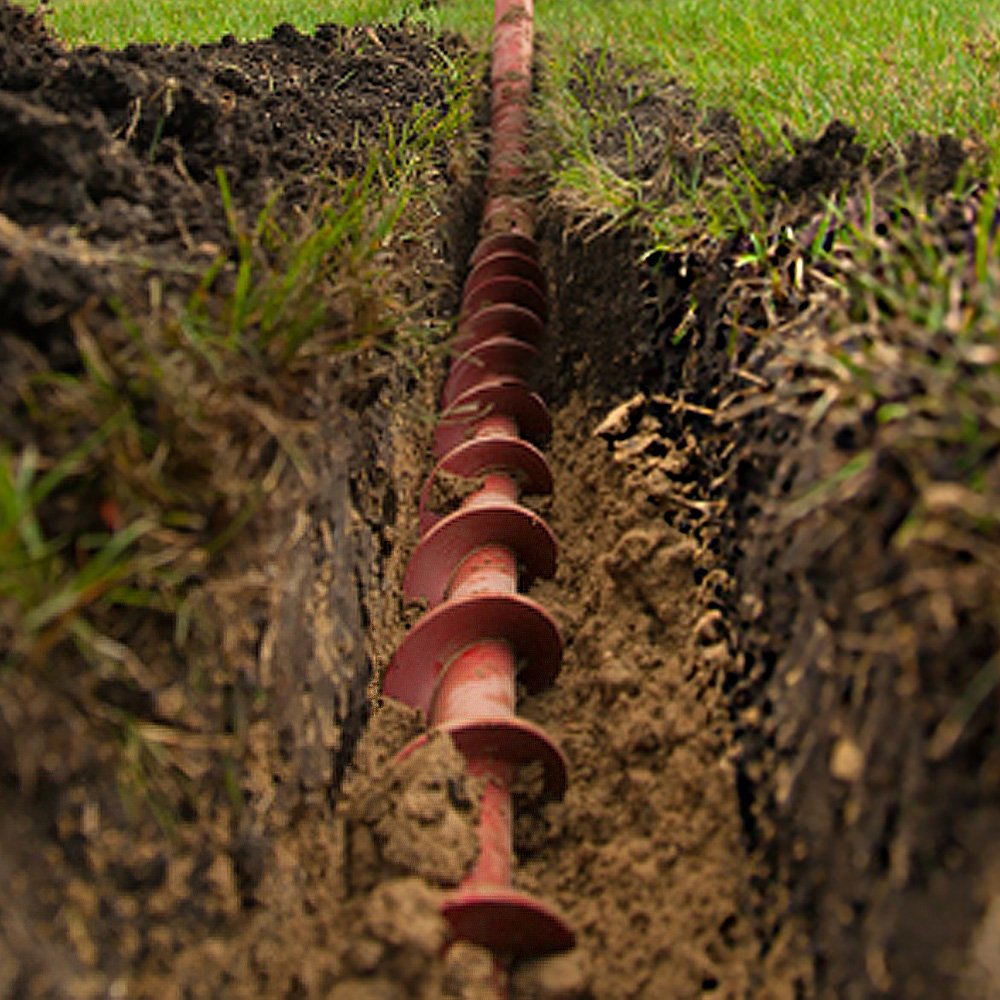
Now that you have mapped out the area you would like the fence to be installed and have done all the proper setup with the wire, it is time to start digging the trench. It is recommended that electric dog fences be buried at least 3 to 5 inches. This depth provides the perfect level of protection while also allowing the wire the maintain a strong signal. Since you have already called 811 to establish where the important utility line and pipes are located within your yard, it is time to start the digging process.
To ensure your earth drill digs straight lines, it is important to lock the swivel wheel into place before you officially start. However, if your fence boundaries require a curve, the wheel will have to be unlocked during that section. After you have fully secured the swivel wheel and the machine has warmed up, you will need to adjust the cutting height to the desired depth you would like. Once that is done, all you will have to do is push your drill to follow the perimeter you have marked out.
Cover The Wire
Once you have fully dug your trench, it is time to lay the wire inside. Ensure the wire lays nicely at the bottom of the trench so that during the backfill process, it is not shifted out of place. Using the earth drill not only saves you the headache of digging the trench but also helps with covering it back up. With the Kwik-Trench filling your hole has never been easier. During the digging process, the machine cleanly deposits the dirt right next to the hole, so all you have to do is push it back with a shovel.
We hope this has helped with installing your very own electric fence. For more outdoor tasks you can do with your Little Beaver earth drill, take a look at our other articles.
Other Little Beaver Drill Articles